
DeepDojo.AIPublished 2026-11-07Updated 2026-11-10中文
Text-to-Image, Image-to-Image, Inpainting: Which?
The first time you open an AI image tool, you see a single text box. You type a sentence and wait for a picture. Once you start revising, the questions multiply. Why did changing a few words barely move the composition?
Why does the person still look different after you uploaded a reference? Why did the whole image change when you only wanted a different cup?
Most of these problems come from skipping one question: why are you making this change? What deserves to stay and what is free to vary decides whether you need text-to-image, image-to-image, inpainting, or outpainting.
Text, images, masks, settings, and the model should all serve that decision.
The order of judgment is this: see what you have, whether a sentence, an image, or an image with a mask. Then write down what has to stay and what may change.
Text, image, mask, settings, and model all work together, and what generation returns is a candidate. Separate what can be generated from what needs protecting. When a new problem shows up, work through it with three words: fact, scope, entry point.
01 Start with what you have, then pick the operation
Say you're making a podcast cover. You have no image yet, so you write a prompt and generate a few candidates. After you pick one you like, the job changes. To turn day into night while keeping the person and layout, you edit from the original. To swap only the microphone, the area you need to redraw shrinks even further.
Check what you have first, then how much you can change:
| Operation | What you provide | What mostly stays | Good for |
|---|---|---|---|
| Text-to-image | A text prompt | Nothing, because there is no original | Exploring subject, scene, and style from scratch |
| Image-to-image | Text plus an existing image | Part of the original's layout, outline, or style | Pushing the whole image in a new direction |
| Inpainting | The original, a mask over the edit area, and the change you want | Most of what lies outside the mask | Replacing an object, fixing hands, changing clothes, cleaning up flaws |
| Outpainting | The original and a direction to extend | The center of the original | Filling the edges, changing the aspect ratio, adding blank space |
| Variations | One candidate image | The original's main visual direction | Browsing close alternatives |
| Canvas and layer editing | Several assets, text, and layers | Each separate element | Combining subject, background, title, and brand elements |
Traditional retouching changes existing pixels directly: crop, recolor, erase, or move a layer. Generative editing rebuilds content from your conditions. The two work well together. AI generates a background or fills in an area, and your editing software handles exact layout, color matching, and finishing.
Before you choose an operation, answer three questions:
- Do I already have a usable base image?
- What has to stay exactly as it is?
- Can the model change the whole image, or only one area?
For the same cover, different answers call for different operations. Settle them first and you'll make fewer accidental changes. Which kind of tool offers each operation is covered in how to choose an AI image tool by task.
When choosing an operation, Firefly’s post-generation editing options distinguish generating variations, filling, removing, and upscaling.
02 Five kinds of conditions work together
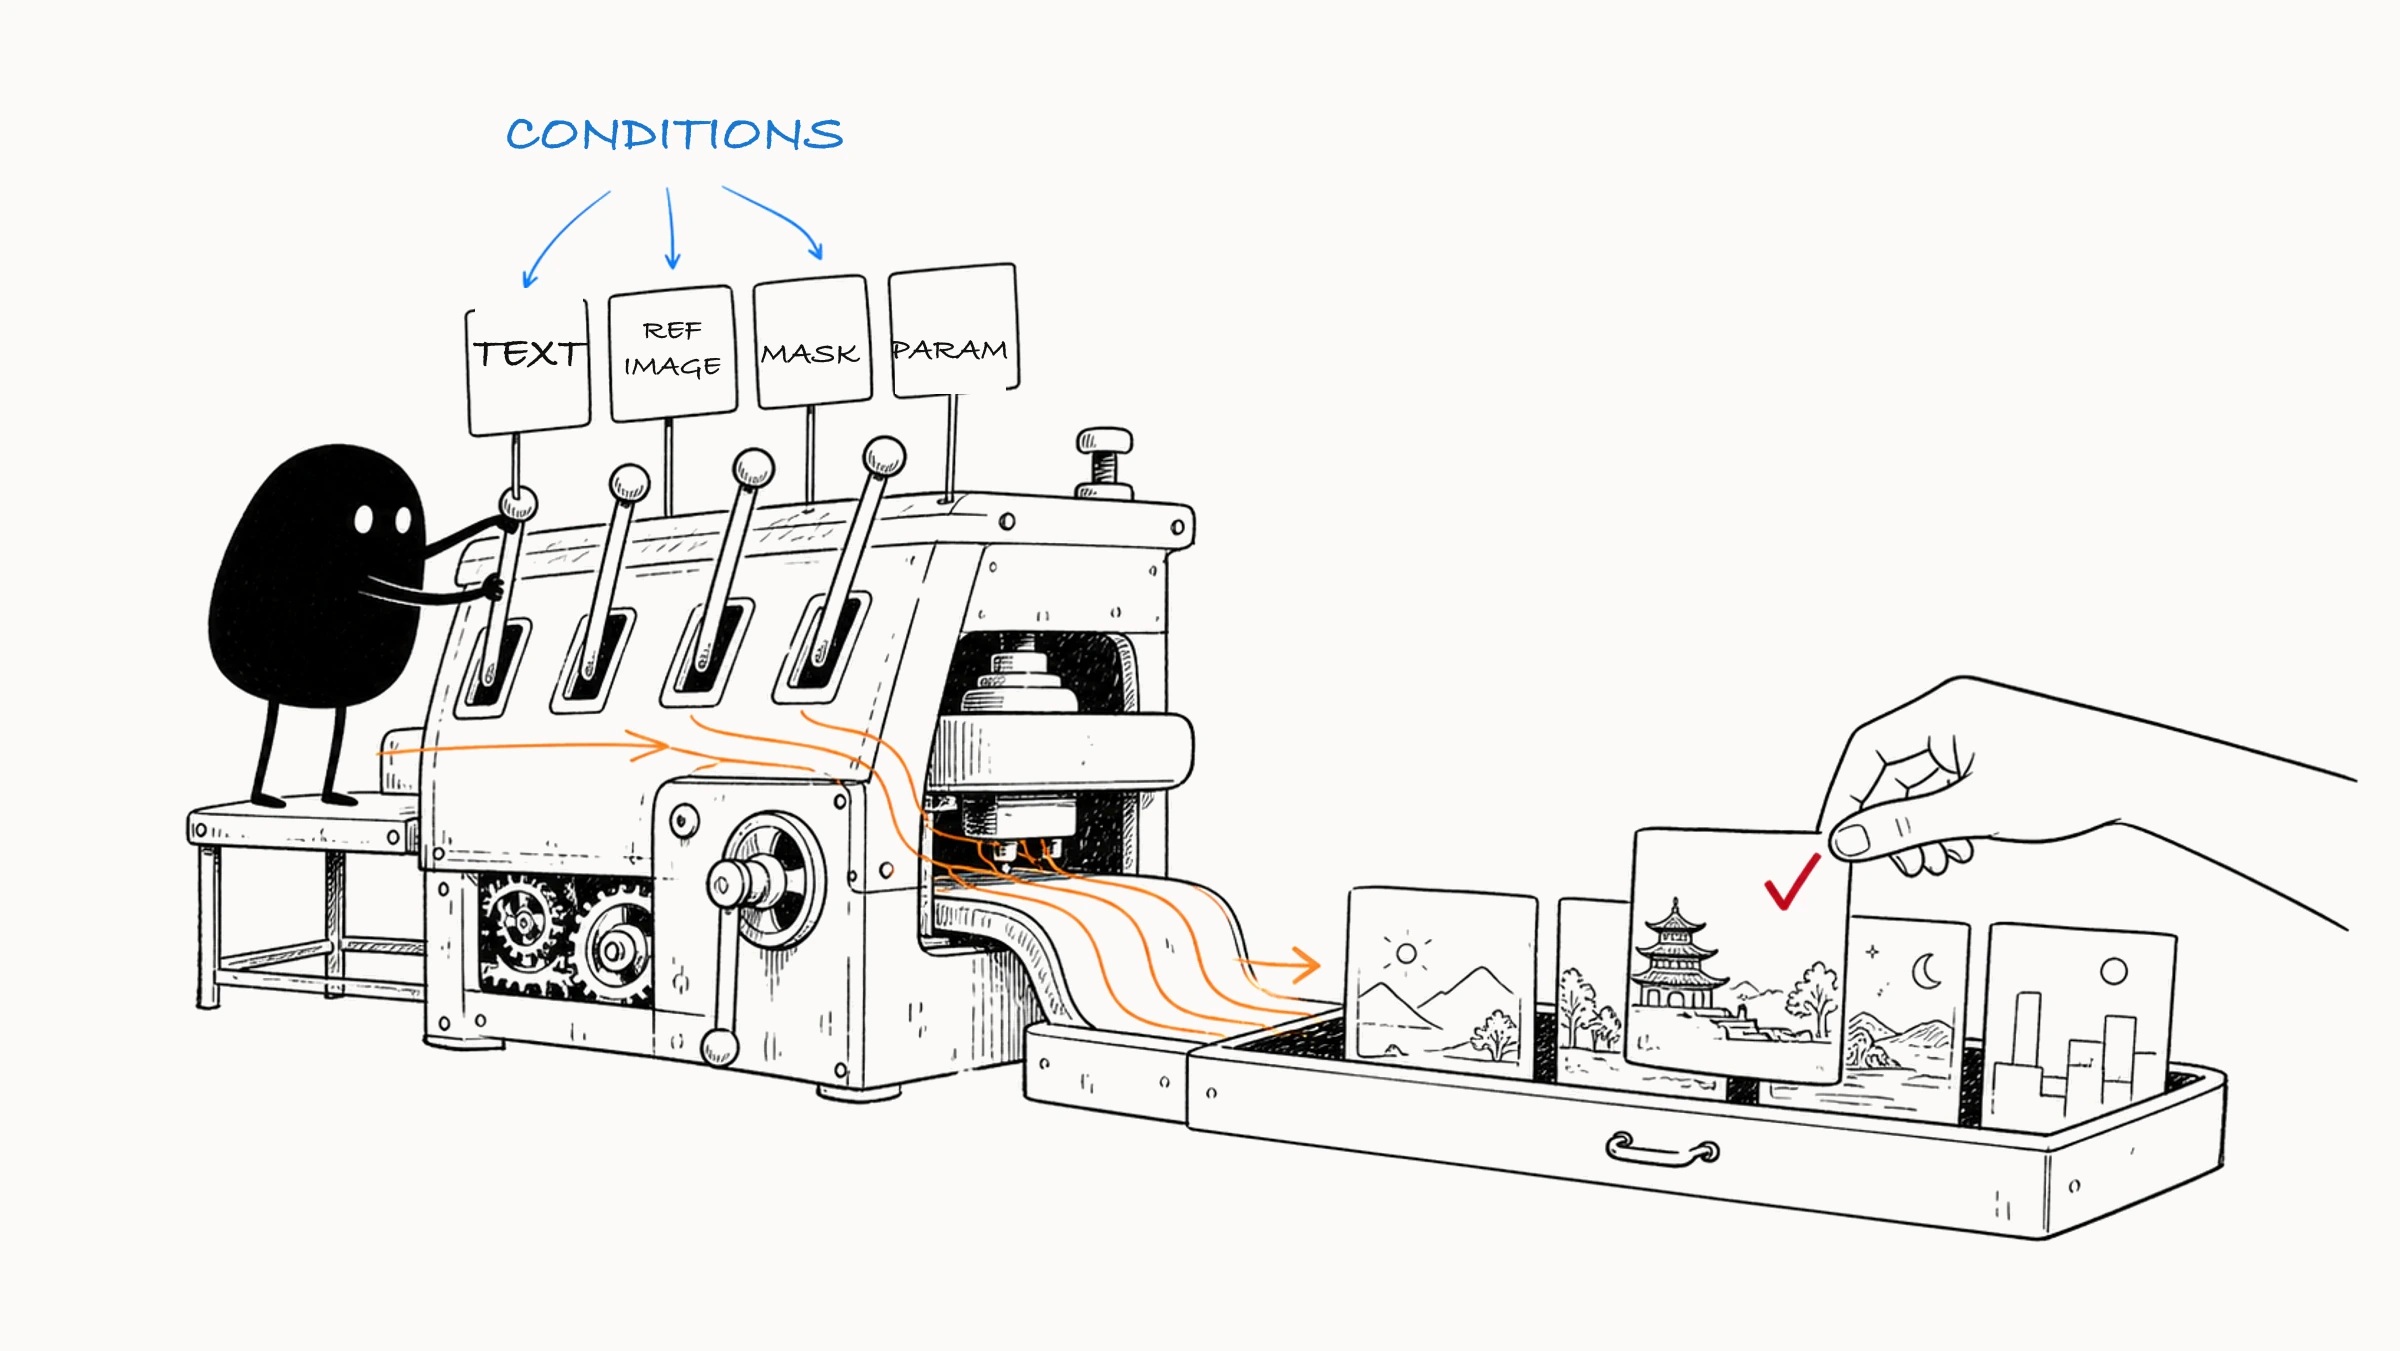
What you give the tool shapes the result in five ways. These are the generation conditions.
| Condition | What it mainly controls |
|---|---|
| Text | Your written instructions, called the prompt: subject, action, setting, composition, light, color, and style |
| Image | Visual traits that are hard to put into words: a person's look, a product's shape, a pose, a layout, a material |
| Mask | The area the model may regenerate, such as only the jacket, or the passers-by in the background |
| Settings | Aspect ratio, randomness, number of results, strength of change, quality, and reference weight |
| Model | What it can generate and its default leanings: photography, illustration, text, structure, and how well it follows instructions |
An image carries traits that words struggle to state, and a mask sets the edit boundary. Setting names vary from tool to tool, and if you switch models, the same text and settings can give different results.
One generation roughly follows this path:
Your goal
  ↓
Text + image + mask + settings
  ↓
The model generates candidates
  ↓
You select, edit, and check
  ↓
A usable image
Look at the conditions as a set. Adding a reference image or circling the edit area often does more than adding a few words. If you pile on requirements, or the text and the image contradict each other, the model makes trade-offs and may drop something important.
03 Treat every result as a candidate
Run the same description again and the people, composition, and details can all change. The model assembles a new picture from visual patterns it has learned, while a search engine looks for images that already exist. One description fits many possible pictures, and each run starts from a different random point, so you get a different image.
One more thing is easy to miss. An image can look great until you zoom in and find an extra finger or a changed product part. A model draws convincing shapes and textures, but product parts, medical structures, and spelling still need a separate check.
When the first image looks good, it's tempting to use it right away. Treat it as a direction first. Do the subject, composition, and mood deserve to stay? If so, make variations or edit locally. If the direction is off, change the conditions. Between a candidate and a finished image, you still have to choose and check.
04 Write down what to keep and what to change
After you pick an image, you may feel it's just a little off and type "make it more premium." But if you haven't worked out whether the color is too loud, the whitespace too thin, or the material wrong, the model has to guess. It may change the person, the background, and the layout all at once, and the parts you liked disappear.
A more useful edit names two things:
- Keep: the person's identity, the product's shape, the camera angle, the subject's position, the main color.
- Change: the background material, the time of day for the light, the clothing color, the space left for a title.
For example:
Keep the coffee cup's shape, white glaze, and front view. Change the background to a light gray stone tabletop, add early-morning side light, and leave clean blank space on the left side of the frame.
This keeps the cup and changes only the background. If your tool supports inpainting, mask just the background. Redrawing a cup that was already right, only to change the backdrop, can alter a shape that was correct. A minute spent stating the request and marking the area precisely does more than extra adjectives.
After editing, compare the cup with the original side by side. If the background improved but the handle got thinner, it still needs fixing. A mask marks the edit area, but whether the area outside it stays untouched depends on how the tool handles it. When a product has to be exact, put the real product on its own layer and generate only the background. After compositing, check the edges and the shadow where the product meets the surface.
Early on, while you look for a direction, the keep list can stay short so the model offers more possibilities. Once you commit to a layout or a character, turn it into a fixed requirement, attach a reference, and narrow the edits to smaller areas. The list of things to protect grows as you make choices.
For the actual operation, Adobe’s Generative Fill guide shows how to brush over an area and enter the content you want there.
05 Separate what can be generated from what must be protected
Sort your content into two types before you decide who does what:
| Type | How to tell | How to handle it |
|---|---|---|
| Exploratory | Many answers work: mood, background props, abstract concepts, lighting, color, texture | Let the model offer candidates, then pick the direction that fits the purpose. Concept art, story scenes, and poster backgrounds usually work this way |
| Exact | Must match facts: product shape, logos, prices, long text, medical structures, mechanical interfaces, data | Use reliable source material, specialist tools, or manual layout. A generated result can look similar and still change key information |
Take an e-commerce scene. The tabletop, the plants, and the light through the window can all be tried several ways, while the bottle and label follow the real item. I would keep the real product photo, generate only the background, and combine them with masks and layers. The setting can be creative, and the product details still rest on something reliable.
The same judgment applies to photos of people. When identity must be preserved, protect the face and key features first, then change the clothes or background. When a person only carries a mood, you can allow more variation.
06 Use "facts, scope, entry point" for any new problem
When you meet a new situation, think in this order:
Facts: what do I have, and what must be accurate?
  ↓
Scope: what stays, and how much may change?
  ↓
Entry point: which generation, editing, or layout method?
"Facts" means original photos, product images, brand files, character sheets, and layouts you've already approved. With those in hand, state the scope in one sentence, for example: "Keep the person's identity and pose, change the clothing color, replace the whole background."
Once the scope is clear, the entry point follows. To explore from nothing, use text-to-image. To vary an image along its existing direction, use image-to-image or variations. To change one area, use inpainting. To add space, use outpainting. Exact text, logos, and buttons go to layout tools. The mask and prompt details for local edits are in five ways to modify an AI image.
When an image goes wrong, work down through direction, scope, and details:
- Direction: if the subject doesn't suit the purpose, go back to the text, references, or model and regenerate.
- Scope: if the subject is right but the background, composition, or aspect ratio is off, use image-to-image or outpainting, or recompose.
- Details: once direction and scope are settled and only hands, edges, or stray objects remain, use inpainting.
If the big direction is wrong, find a new direction first. If only one spot is off, focus on that spot. Detailed retouching takes effort, so spend it on images that could become the final one. Touching less unrelated content in each round also protects what you already got right.
Back to the podcast cover. At the start you had no original and could explore freely. Once you picked an image, it became the base for the next round. The closer you get to what you want, the smaller the allowed change usually is. Check your materials and your keep list again each round, and your choice of operation will have a reason behind it.