
DeepDojo.AIPublished 2026-11-07Updated 2026-11-09中文
Fix One Spot in an AI Image Without Redoing It
The person and composition are both fine, and only one hand needs fixing. Regenerating the whole image would be a shame. But if the subject and purpose don't match in the first place, even a fixed hand won't make it a usable image.
Before you edit, decide how much needs to change.
Changing less is safer. If only one spot is off, edit only that spot. To see close alternatives, make variations. When you need more space, outpaint. When a real product and text have to be combined, move to a layered canvas.
Protect what you've already confirmed, and editing takes less effort.
Choosing an edit method starts with how widespread the problem is: regenerate when the whole image is off, make variations to see close alternatives, inpaint when only one spot is wrong, outpaint when you need more room, and use a layered canvas when a real product and text have to be combined.
Inpainting depends on a few controls and an accurately painted mask, and the local prompt describes only what to do inside the selection. After each edit, look for signs of editing failure and switch methods early, before repairs make it worse.
As long as part of the image is right, protect it first and edit from small to large.
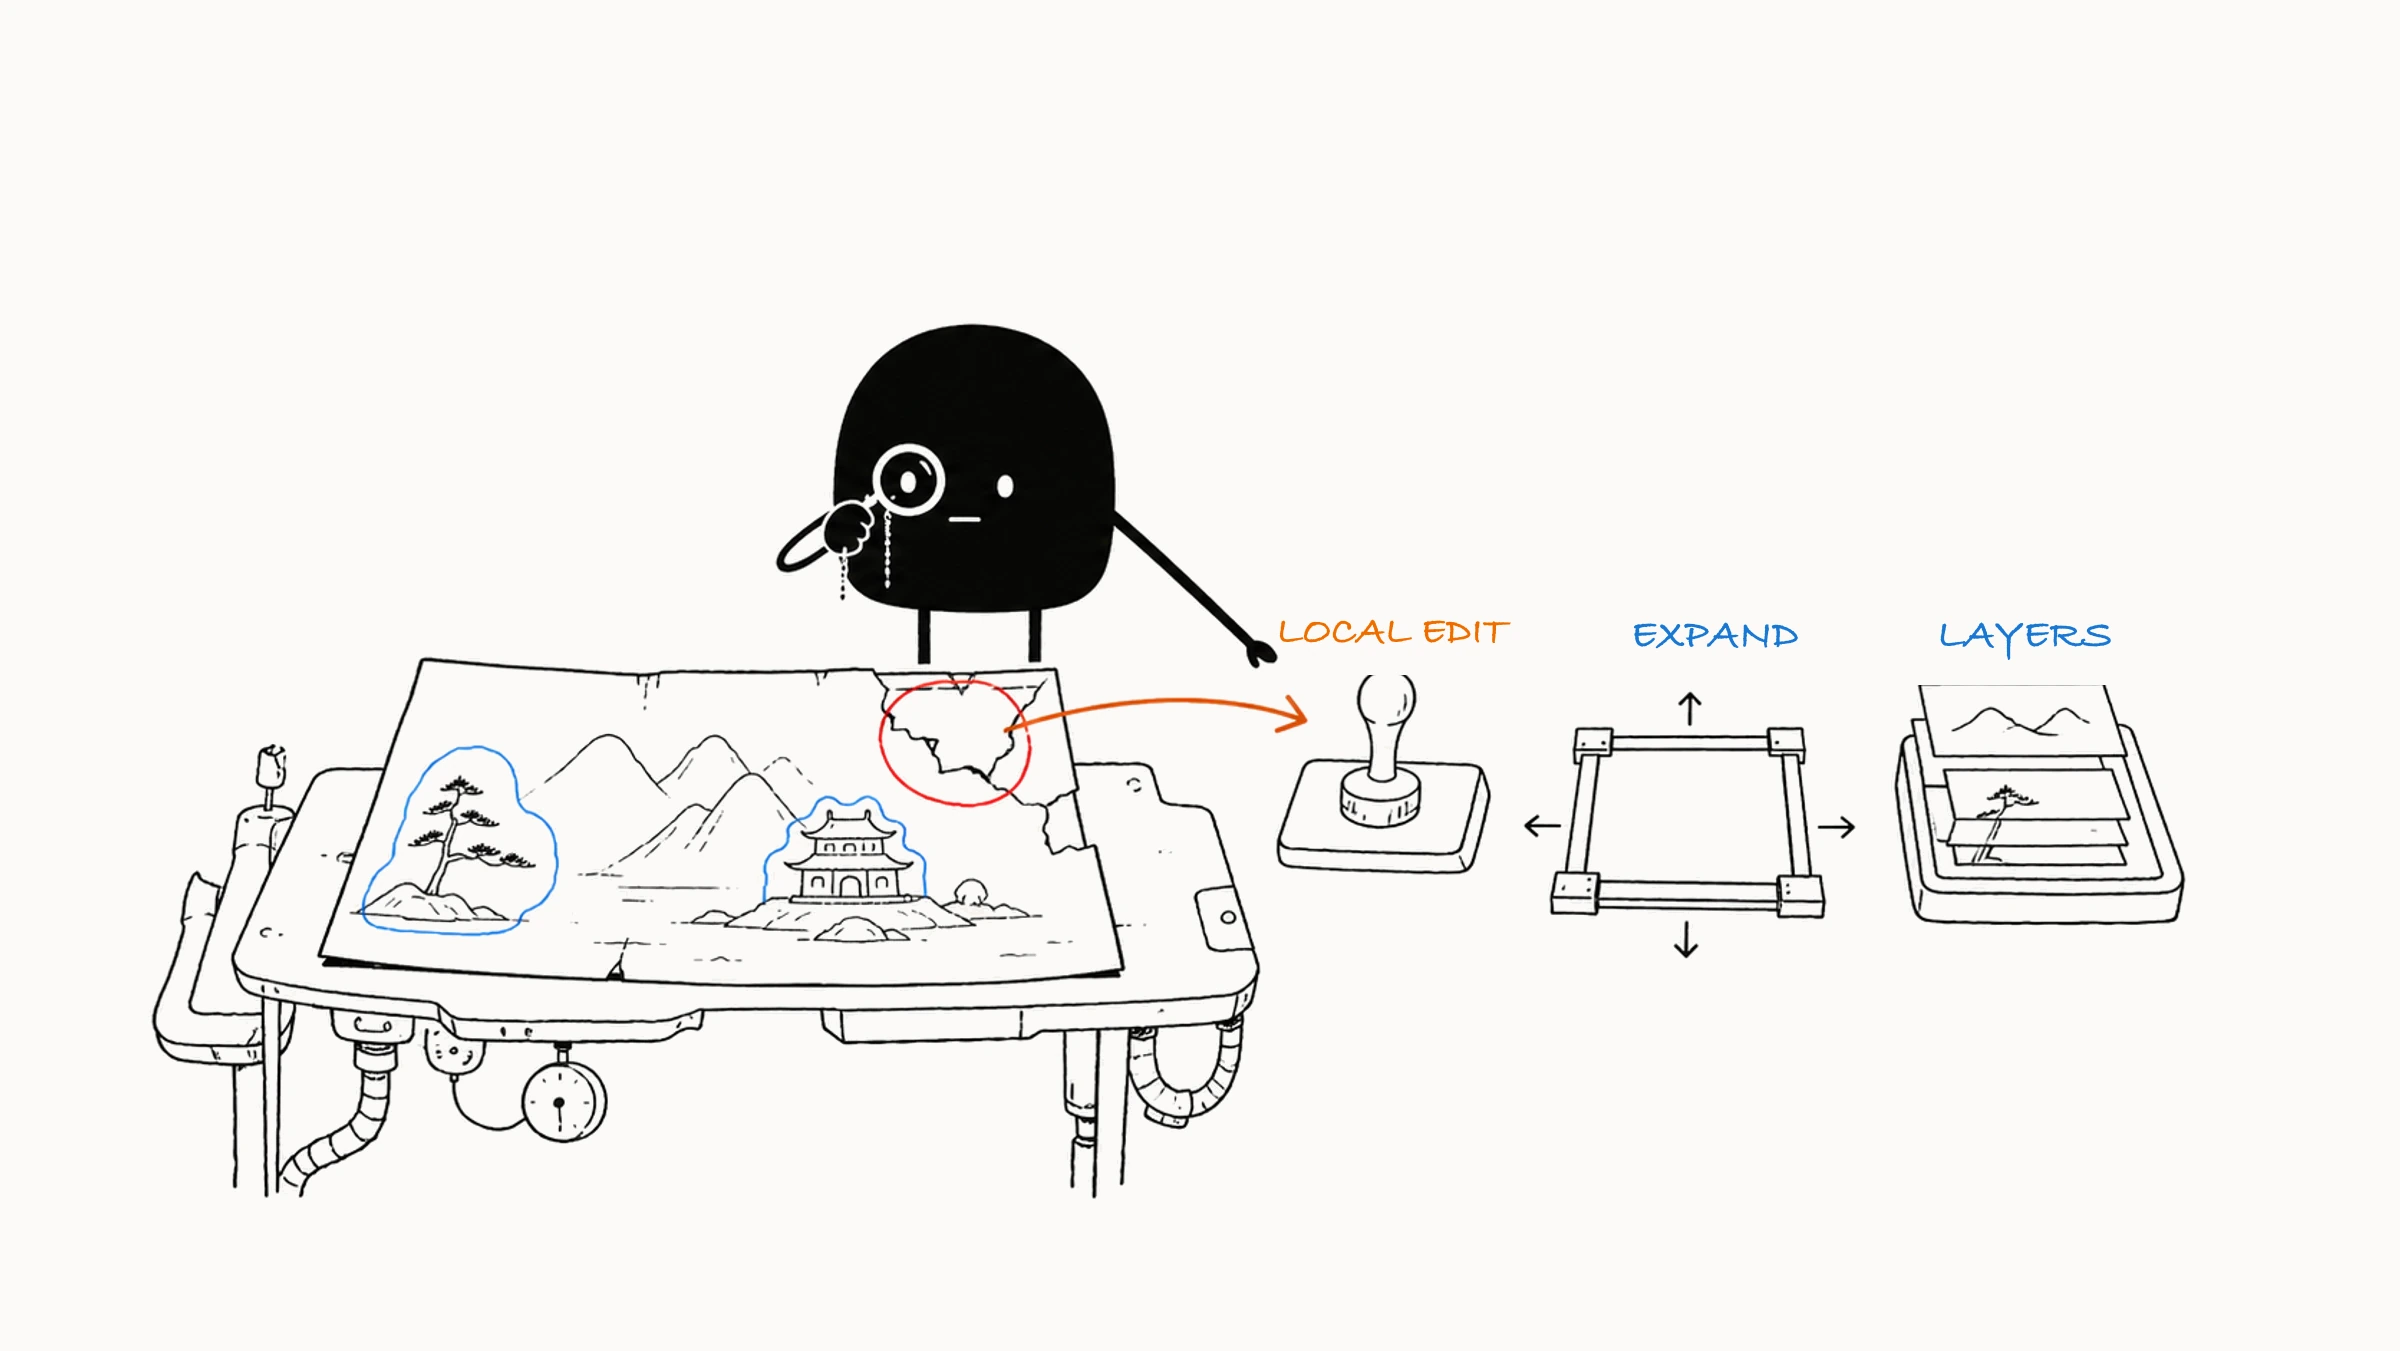
01 Choose the edit by problem scope
Sort problems into whole, direction, local, boundary, and combination.
| Problem scope | Typical symptom | Preferred method |
|---|---|---|
| Whole | The subject, purpose, or composition direction is wrong | Regenerate |
| Direction | You like the current theme and want to compare similar compositions or expressions | Generate variations |
| Local | A hand, clothing, clutter, edge, or small object is wrong | Inpainting |
| Boundary | The ratio is wrong, the title area is short, or the subject is cropped | Outpaint or recompose |
| Combination | A real product, a generated background, text, and a logo must be delivered together | Layered canvas and design software |
See first whether most of the image is worth keeping, then estimate which fix takes less effort. When subject, composition, and light and color are right and only one or two problems remain, keep editing. When the structure is wrong all over, regenerating is usually faster. Also decide whether the content needs to be kept exactly. Real products, a person's identity, official logos, and text go on protected or separate layers, so the model has fewer chances to reinterpret them.
02 The boundary between regenerating and variations
Before you run another batch, ask yourself whether you still want to keep most of the current image. If the theme and composition suit you and you only want to see other expressions, prop positions, background details, or a slight color change, make variations. They keep part of the subject, composition, and style and give close alternatives.
If the subject is wrong, the composition doesn't suit the purpose, the style is far off, or the structure is wrong everywhere, go back to the prompt and inputs and find the image again. Accept the redo here. Clinging to the current image and patching it piece by piece takes more time and may still not produce something usable. If only one clear small problem remains, a small variation or a local edit could work, and you continue choosing by what to keep and how much to change.
Variations come in degrees. Small changes suit clients choosing among a few similar options, and large changes suit keeping the theme while widening the creative range. Before you generate, write what to keep and what may change, so "make a few more" has a clear boundary. The full approach to choosing and revising round by round is in the four stages of iteration and the one-variable method.
03 Four controls for inpainting
Inpainting redraws the area under the mask and takes lighting, perspective, and style from the surroundings. In OpenAI's image generation documentation, image editing likewise uses a mask to mark the area to replace. Look at four things:
| Control | What it provides and how to choose |
|---|---|
| Original image | Supplies light, perspective, material, and style. A clear image with clear structure and little occlusion is easier for the model to read |
| Mask | Marks where to change, covering the wrong content and leaving room for the edge to blend |
| Local prompt | Says what to change into, what to keep, and how to connect to the original |
| Strength of change | Decides how much is allowed to change. Use lower strength for small flaws, and give an object replacement enough room and test a moderate strength |
When a fix goes wrong, it's often because these four don't line up. To rebuild a hand while masking only one finger leaves the new structure too little room. Conversely, to change only a cuff but circle the whole upper body puts the face and pose into the editable area. After you write the change, also check whether the masked area fits it.
04 How to draw the mask
When you draw a mask, every extra area you include is another area the model is allowed to change. To fix a hand, leave room for the whole structure. To change a cuff, keep the face and pose safe. How large to make it depends on how the object meets what's around it. Include a correct area only when it truly has to change too. Before drawing the mask, mark two kinds of area:
- Edit area: the model may regenerate it.
- Protected area: the person's face, the real product, key lines of the composition, and other confirmed content.
Glass, hair, reflections, and translucent objects have edges that are harder to handle. Leave the mask some room to blend, and zoom in after generating: is the edge natural, has color spilled, is texture repeating, do the light and shadows connect? Break a large change into rounds: change the background first, then fix the subject's edge, and finally unify the contact shadow. Handle one relationship per round, and a failure is easier to roll back. Set the specific range by task:
| Task | Mask and protection focus |
|---|---|
| Fix structure | Cover the whole structural unit. For a hand, include the palm, fingers, the needed wrist, and where it touches a prop |
| Replace an object | Cover the old object, its original shadow, and a bit of background. When a short cup becomes a tall bottle, leave room above |
| Remove an object | Include the object, its cast shadow, reflection, and the area it hid. After removing a floor lamp, also fill in the wall, floor, and lamp shadow |
| Change clothing | Cover the clothing outline, folds, and needed edges, and protect the face, hair, hands, and pose |
| Change background | Protect the subject, and check hair, translucent materials, and gaps in clothing separately. Generate the background first, then handle blending |
Sometimes the structure is right in round one and the edge still looks pasted on. Then circle just the seam and bring in light, color, texture, and perspective. In the first round, slightly overshoot the object's edge to leave room for structure. In the second, shrink the area to the seam and work on blending. The two passes solve different problems.
05 Local prompts describe only the selected task
A local prompt can be written in this order:
Change only where + change into what + keep what + how to blend with the originalA hand-fixing example:
Change only the right hand and wrist inside the mask. Generate a naturally structured right hand with five clear fingers, lightly holding the white cup handle. Keep the cup's shape, the person's pose, the sleeve, and the background. Skin tone, side light, and shadow direction match the original.
To remove an object, describe what fills the gap:
Remove the red cup from the table and fill in the table with continuous wood grain, natural highlights, and the original shadows. Keep the books and lamp around it in their positions.
To add an object, give size, position, material, contact, and light:
Add a small white ceramic vase to the right side of the table, its base resting on the table with a soft contact shadow, lit by the window on the left. The vase is shorter than the lamp and doesn't block the title area.
06 Use outpainting to add space
Outpainting generates content beyond the original edge, and it suits changing the ratio, completing a subject, extending a background, and adding a title area. When the original has extra space, you can crop. When the space is insufficient, outpaint. For example, to turn a square image into a horizontal ad, extend the background left and right, keep the product, and add copy space. An outpainting prompt covers four things:
- Which direction to extend.
- What in the original stays.
- What scene, light, perspective, and material the new area continues.
- What job the new area does.
For example:
Extend the image to a 16:9 horizontal. Keep the person on the left, the pose, and the existing street unchanged. Extend a rainy city street to the right, with perspective, blue-gray tone, and road reflections matching the original. The right 35% stays low in detail for the title later.
First place the original in the target canvas and confirm the subject's position and what the new area is for. Then extend one side at a time in small steps, checking perspective and light each time. Finally, clean up repeated texture and seams, and try placing the layout. State how much detail the new area has. A title area can be written as "light gray gradient wall, low contrast, no obvious objects," and an extended setting as "distant buildings gradually blurring, with less detail than the subject area." That helps the viewer see the subject first.
If the subject looks too small after outpainting, first check whether all the new environment is needed. Reduce the extension, or use light, leading lines, and contrast to bring the eye back to the subject. When a person or building is cut off at the original edge, outpainting tries to complete the unknown structure. After generating, check hands and feet, clothing, doors and windows, and perspective closely. For structure-heavy content, prepare extra references or use real material for more reliable results.
07 Protect exact content with layered canvas
Products, people, text, logos, prices, and QR codes in commercial images all need to be exact, so save them in layers wherever you can. Generating everything at once looks like fewer steps, but changing the product or copy can then disturb the whole image. Protect the exact content on its own and let AI handle the setting, and later changes are easier.
| How to handle | Content |
|---|---|
| Locked or saved separately | Real product and packaging, a person's face, the official logo, text, prices, QR codes, brand fonts and layout grid, and client-confirmed areas |
| May be generated or adjusted | Background, sky, tabletop, light reflections, mood texture, non-key props, title space, and extended areas |
When you composite, join subject and background in this order:
Size and perspective → contact shadow and reflection → sharpness and grain → mood and overall color grade- First check how much space the subject takes, whether its base sits on the surface, and whether the camera height matches.
- Then add shadow where the subject touches the surface. The shadow starts at the bottom, runs opposite the main light, and its softness fits the setting. Glass and metal also need a little environmental reflection.
- Match sharpness and grain. A sharp product on a blurred background needs a plausible depth of field, and a low-resolution subject on a high-resolution background gets soft edges. Keep the key details of the person and product as you adjust.
- Last, add haze, light spots, and filters to unify light source, color temperature, and overall effect. Check that these steps don't hide structural problems or change the real product color.
Label each layer with its content and lock state, and limit AI edits to explicit selections. At delivery, keep editable source files so copy can be replaced and sizes adapted.
08 Case: a bedroom scene for a real scented candle
Say a client provides a real scented candle and you need a bedroom scene.
- Save the original, cut out the product, and check the glass and wooden lid edges.
- Generate a background without the product per the Brief: an early-morning nightstand, linen, soft window light, and title space.
- Choose a product photo whose shooting angle matches the background, place it in the scene, and adjust size and position. If you only have a front photo but need a view looking down at the wooden lid, swap the photo or change the background angle. Stretching or rotating a layer can't supply a real top.
- Protect the bottle, packaging, and label, and handle contact shadow, light reflection, and ambient light only at the bottom and around it.
- Place the official logo and copy on separate layers.
- Compare outline, color, material, and text side by side with the original.
After the bedroom version, you can switch to a bathroom or a dining table, and the layers you built come in handy. The real product layer can stay, and you mainly replace the background and the contact relationship, then check whether they connect. Product information also always rests on original material.
Posters work the same way. A base image alone may look well composed. Once the official title, selling points, and logo go in, they cover the person or land on a cluttered background. First place text placeholder boxes and look. If the title area is short, extend the image or clean up the background. If the subject's position gets in the way of layout, move it or resize it first, then fill the gap. Once the space works, add official text, logo, price, and QR code. Exact text is done in design tools, and AI handles only the main visual and the background. Posters in several sizes need their own composition: horizontal, vertical, and square have different title areas, and simple cropping throws off the subject or the information.
09 Recognize the signs that editing has failed
When any of these signs appear, pause editing and change the method:
- The same area is repeatedly fixed wrong, or the old and new perspective and light never connect.
- An edit affects identity or the product, and the mask keeps growing.
- Quality, color, or texture keep deteriorating, and the repair time has passed what swapping the image or layered compositing would take.
Check the mask, prompt, and strength of change first. If the inputs are fine and the result still goes wrong again and again, switch candidates, redraw the whole object, or work in layers. For content where structure and facts matter, go back to the real material and specialist software to check. When you can't tell which step the problem comes from, start with common AI image problems and how to troubleshoot them.
After one round of local editing goes well, save a version. After several rounds, compare subject, color, and sharpness side by side with the original. You may have been staring at the selection and missed that other places slowly changed, so keeping the original and key versions gives you somewhere to go back to. It's hard to give up on an image you've worked on for a long time. Look at what problems remain, then decide the next step. If a problem is independent and its range is clear, keep fixing. If fixing here breaks something there, consider switching candidates. When the product or identity is damaged, recompositing from original material is more reliable. What you compare is how much work remains from now to delivery.
In each round, judge by specific criteria whether it's fixed: the hand structure is right, the title area is wide enough, the contact shadow looks natural. Then save a version and move on to the next item.